A few months ago I proposed a refactor for the Arduino RepRap firmware. I was quick to code it up and build test cases on the desktop, then ported to the Arduino… Where it failed miserably. There the code languished as I spent time on it here and there. I attempted getting SimulAVR working, but it doesn’t support the Arduino chipsets (thought about adding support). I tried AVR Studio in a bootcamp’d windows install, but it kept hanging when debugging this problem. As a last resort, I ported the avr-libc memory apis to the initial desktop refactor, and was able to see the problem clear as day. I spent some time reducing the repro to the smallest form:
void testMalloc()
{
    size_t* array = (size_t*)malloc(4 * sizeof(size_t));
    free(array);
    array = NULL;

    array = (size_t*)realloc(array, sizeof(size_t));
    array = (size_t*)realloc(array, 2 * sizeof(size_t));
    array = (size_t*)realloc(array, 3 * sizeof(size_t));
    realloc(array, 4 * sizeof(size_t));
}
There is a bug in the free list manager in Realloc, specifically when growing a buffer into the next free entry. I was convinced I had a bug in a fairly large codebase, and whittled it down to this reproduction. I’m now playing with a couple of fixes, but need to figure out how to get a ‘blessed’ fix into lib-avr.
Stepping through the malloc into the free results in:
00000010 00000000 00000000 00000000
00000000 00000000 00000000 00000000
00000000 00000000 00000000 00000000
Over the first realloc:
00000008 00000000 00000000 00000004
00000000 00000000 00000000 00000000
00000000 00000000 00000000 00000000
Over the third:
0000000c 00000000 00000000 00000004
00000000 00000000 00000000 00000000
00000000 00000000 00000000 00000000
And finally:
00000010 00000000 00000000 00000004
00000000 FFFFFFFC 00000000 00000000
00000000 00000000 00000000 00000000
At this point the free block pointer (__flp) points to the second line, with a size of 0xfffffffc. The next allocation fails.
I’ve created my first grid beam using the grid beam jig I posted about. It took me about a half an hour to cut beam holes in an 8 foot beam. Like others, I’m curious if the number of holes will compromise the beam…
Only 5 more to cut.
The problem with multitasking is that your time is divided amongst all the projects you have going on. Not only divided, but context switching has overhead. Because of this, and the limited shop time, I haven’t made much progress on any one area to warrant separate posts, so I’ll recap.
Cold Garage

The Cool Tools blog had a recommendation for the Dyna-Glo pro heater. Their usage was similar to mine, so I decided to try it. I have to say – while it heats up the place in no time, it is loud and smelly. But the garage is now usable until I can insulate it and install something more permanent… (Although my father says “There is nothing more permanent than that which is temporary”)
Grid Beam Bench (and experimental cartesian bot?)
At Maker Faire last year, I came across a neat display about Grid Beam. Basically this is a large scale wood erector set which involves 2×2 sticks of standard lengths, with a repeating hole pattern. These beams are joined using furniture connector bolts. By joining 3 beams together, you create a very strong ‘tri’-joint, which not only is self squaring, but creates a very rigid body. In fact, it seemed more rigid than the plastic and aluminum joints I currently use. Could I use a wood frame for the cartesian bot?
A book was released a few months ago; Half of which is an anthology of grid beaming, the other half goes into a little detail about assembly. You can get it from New Society publishers:Â

Using the lathe and mill has been slowly destroying my detail bench, where I do the electronics work and debugging. Task switching between metal work and detail work also slows down the whole process, so I decided to build a ‘dirty’ bench for the metal and wood work. It seemed like a perfect opportunity to try out Grid Beam building techniques.
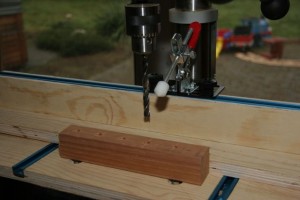
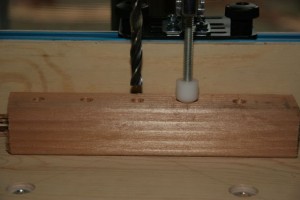
My first foray into Grid beam stick construction were failures. There is no margin for error while cutting the holes, as errors propagate down the stick pulling them out of square very quickly. In order to drill accurate holes, I built a jig:


This is mostly a standard drill press jig. The main difference is in the holder – there is a custom delrin tapered plunger, which aligns and holds the beam prior to drilling. I’ve only drilled these sample beams for testing, so we’ll see how the hold thing goes together. I’ll post separately on this progress.
Arduino Plugin for TextMate
The arduino plugin for textmate has been taking much more time than it should. I’ve almost completely rewritten it in order to clean up the code, refactor based on ‘learnings’ about Cocoa, add multiple Arduino support, and allow the serial monitor to stick around while compiling and uploading. Many of the issues I’ve encountered were specific to TextMate (such as NSConnection issues), and some Leopard problems (NSConnection doesn’t like being created on two different threads). However, I’m tracking down the last issue (If you shutdown the serial monitor, you cannot restart it without restarting textmate. NSConnection doesn’t seem to have a way of saying is the server still alive). Expect a beta by end of the weekend.
RepRap firmware refactor
I had worked on a design and implementation of Arduino design patterns which I will leverage in the Refactor. However, I hit a bug which doesn’t reproduce on the desktop test client, so I believe it is a specific problem with the Libc on the Arduino. That project was put on hold until I got the hardware debugger. Â I have it now, and it will be the first thing I work on after I release the new Arduino plugin.
Hercules Extruder
With Shop time limited, this has bubbled down the list. Since my implementation depends on the Firmware refactor, it didn’t seem a high priority.
The Prometheus Fusion Perfection blog has developed a laser cut Herk extruder. It looks VERY sweet:

(If that person emails me their address, I’ll send a milled stainless steel barrel and extruder head.)


